Getting started
From sign-up to your first answered DM: pick a goal, connect Instagram, build your first reply or teach the agent, set guardrails and switch replies on.
From sign-up to a working reply is a handful of steps. The setup page at /onboarding tracks them and tells you how much is left; you can also reach every step directly from the sidebar.
The setup steps, in order
The setup page first asks "What should HyperDM do first?". Whatever you pick, the five steps and their order are the same: Teach it about your business, Configure your agent, Set your guardrails, Turn on AI replies, and Connect Instagram last. The first four are preparation that works with no channel connected; connecting is the moment it goes live.
Picking Send a guide or collect leads or Share my offer in DMs adds two optional rows that don't count toward the five: Build your comment-to-link reply, right after the first step (a fixed comment-to-DM reply that saves before anything is connected), and Check a delivered reply, after Connect Instagram. Your pick also tunes the example questions in "See it answer" and the recommendation at the end of setup.
You can change the goal at any time and the page redraws the rows.
Every step except connecting needs an owner or admin — teammates on other roles, including the default agent role, are refused with "Only owners and admins can change what the AI says or knows." One gate is hard: the page won't offer Turn on AI replies until knowledge, agent and guardrails are done.
| Step | Why it matters | Roughly |
|---|---|---|
| Teach it about your business | So it answers from your real prices, policies and FAQs instead of guesses. | 5 min |
| Build your comment-to-link reply (optional, guide/offer goals) | Choose a keyword, paste your guide or offer link, and save the automation live. It starts sending once Instagram is connected. | the page shows it |
| Configure your agent | So replies sound like you, not like a bot. | 3 min |
| Set your guardrails | So it never discounts past your limit or makes a claim you'd never make. | 2 min |
| Turn on AI replies | So it actually answers. This is the switch, and it starts off. | 1 min |
| Connect Instagram | So HyperDM can read and reply to your DMs — the go-live step. | 2 min |
| Check a delivered reply (optional, guide/offer goals) | From a second account, comment the keyword and confirm the link arrives. Counted from a real delivery after the automation's latest edit — a preview does not count. | the page shows it |
The setup page shows a progress bar and "about N minutes left", and its primary button is always the first step you haven't finished — not a generic "go to dashboard".
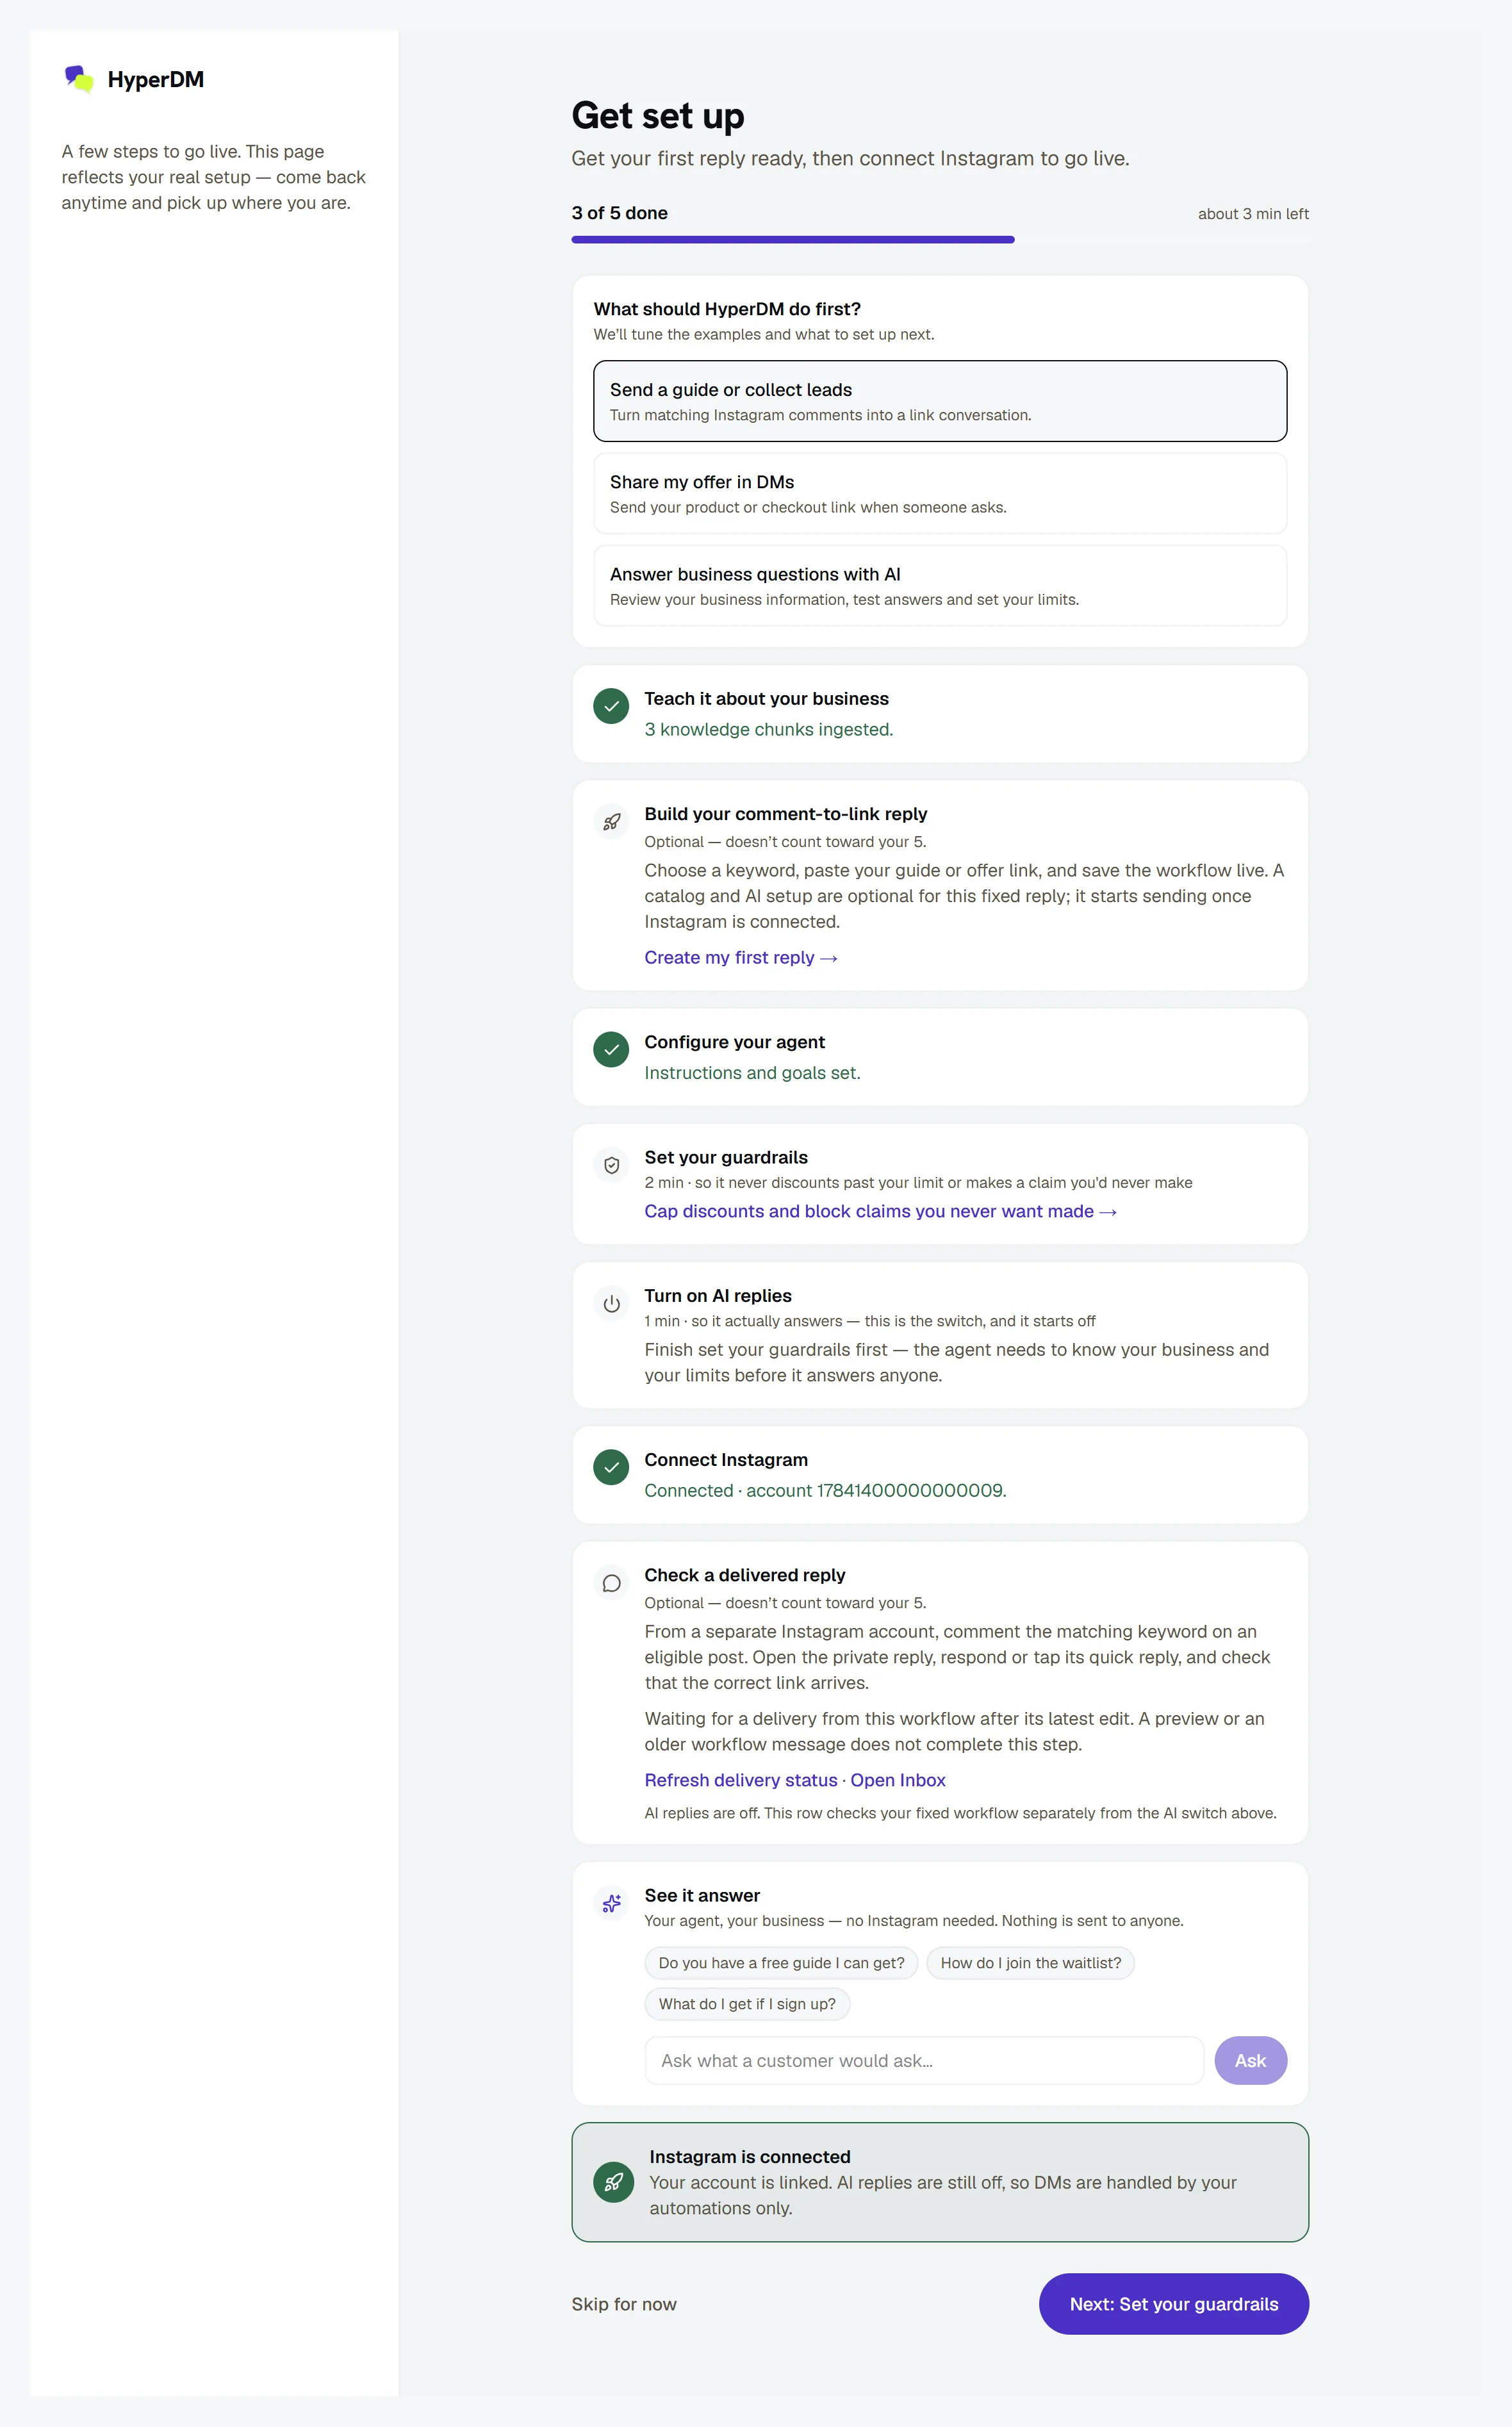
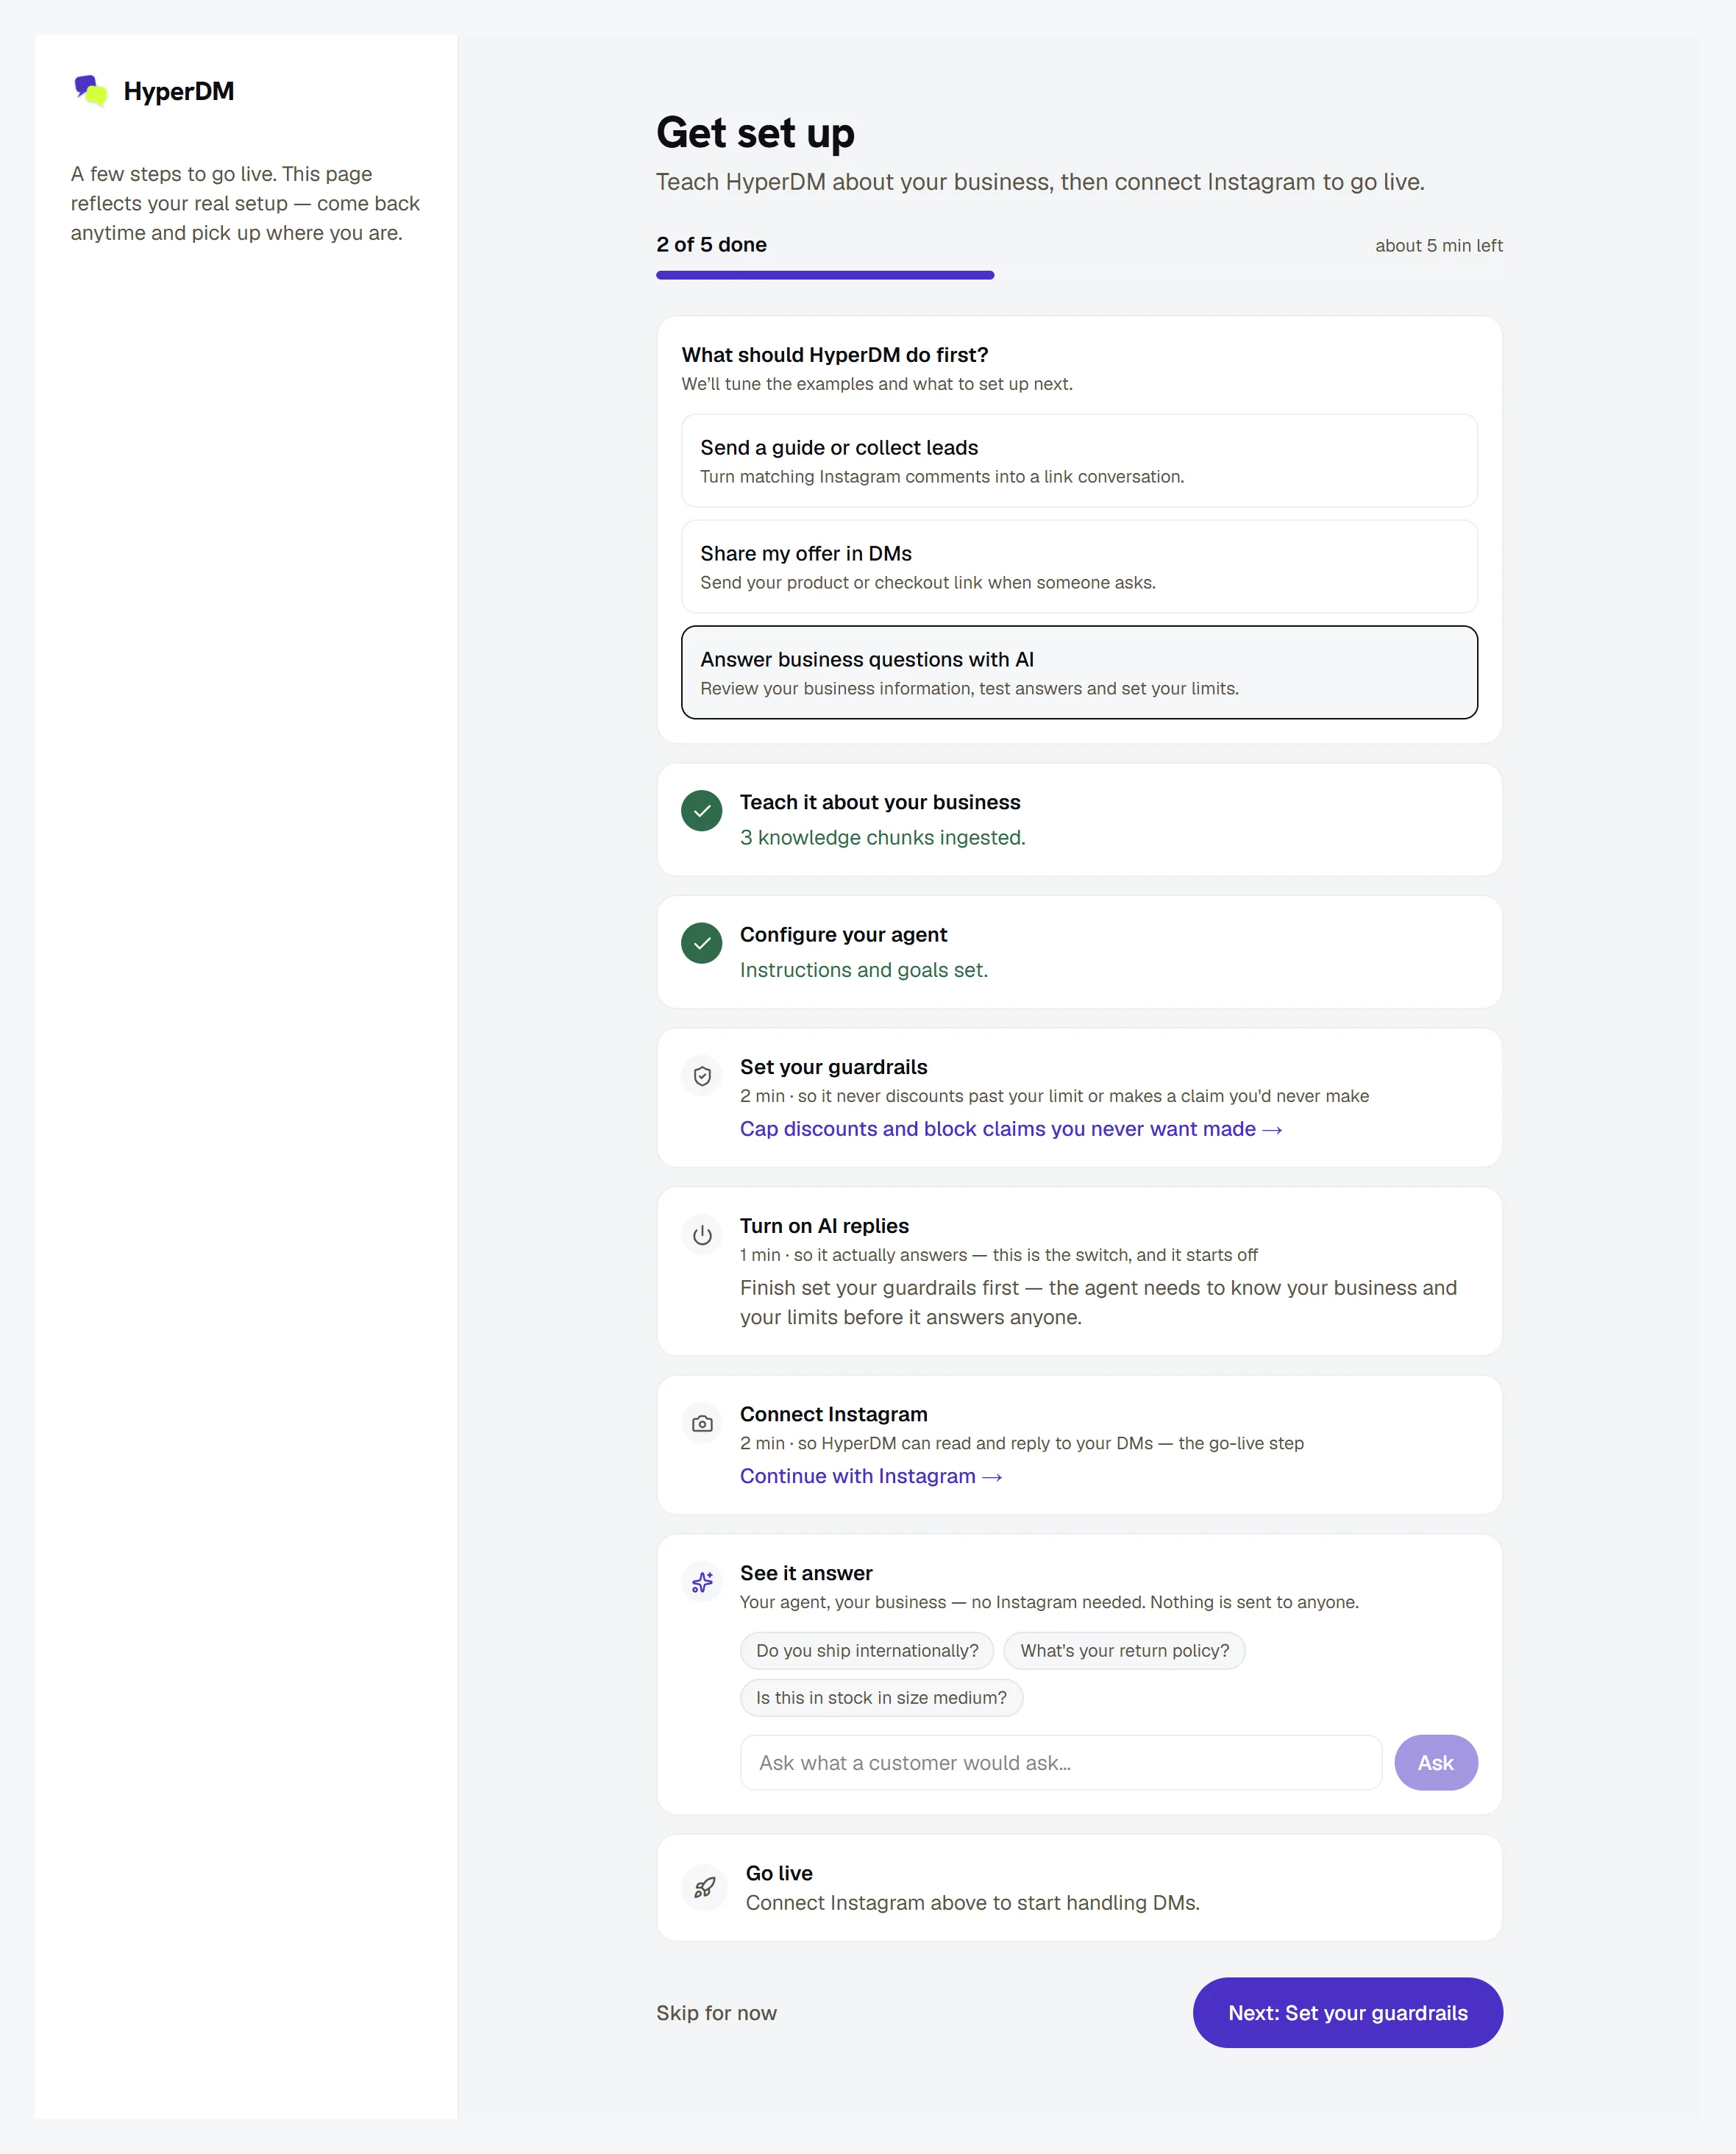
The sections below walk each step. The optional comment-to-link reply is Set up comment-to-DM.
Connect Instagram
- Go to Settings → Channels, or use the Connect Instagram button on the setup page.
- Click Connect Instagram. You are sent to Instagram to authorise the connection.
- Approve the permissions Meta asks for and you are returned to HyperDM.
- The Instagram card now shows a green Connected badge, and your @handle and profile picture appear on the Dashboard.
Requirements and gotchas:
- You need an Instagram professional account (Business or Creator). A personal account cannot be connected.
- Only an owner or admin can connect or disconnect a channel. Other roles see the card and its status, but no button — see roles-and-permissions.md.
- On the Free plan you can have one DM channel connected at a time. Reconnecting the same channel is always allowed — that is a re-auth, not a second channel.
- If the card says Needs attention or Reconnect needed after connecting, see troubleshooting.md.
Teach it about your business
Four ways in, ordered by how little you need to already have. You only need one.
- Go to Agent → Knowledge.
- Pick whichever fits:
- Paste it. In the Knowledge card, put a short label in the first box (
faq,pricing,shipping_policy) and your text in the box below, then click Ingest. This is the fastest path and needs nothing but a paragraph. - Crawl your site. In Import from your website, enter your domain (
yourbrand.com) and click Crawl & ingest. HyperDM reads your product, shipping and FAQ pages. - Sync Shopify. In Sync your Shopify catalog, enter your store domain (
store.myshopify.com) and click Sync catalog. Your published products land in Products with images and buy links. - Load a sample. Click Load sample to seed demo knowledge so you can see the agent work before you write anything real. Replace it before you go live.
- Paste it. In the Knowledge card, put a short label in the first box (
- Anything you ingest appears in the list at the bottom of the tab, tagged with its label.
On Free you get one knowledge source of your own — the Shopify sync and the sample data never count toward it, and updating a source you already have (re-pasting under the same label, re-crawling the same site) replaces it rather than using a second slot. Every paid plan is unlimited. Sources you connect (crawl, Shopify) show under Connected sources, where you can set re-sync to Manual, Daily or Weekly, sync now, or remove them.
Full detail: agent.md.
Configure your agent
- Go to Agent → Overview.
- Under Goals, toggle what the agent should be doing. The defaults are: answer product & policy questions (on), recommend products (on), recover abandoned carts (on), capture emails (off), help customers check out (on).
- Under Instructions, write what you'd tell a sharp new hire — for example "Recover carts, answer sizing from the catalog, and hand refunds over $50 to me."
- Choose a Reply length: Short, Medium or Long.
- Optionally set Response pacing — None, ~2s, ~5s or ~10s. A short pause plus a typing indicator stops replies landing machine-instant.
- Click Save changes.
The step counts as done once you've written a voice or changed any goal from its default.
Set your guardrails
- Go to Agent → Trust & Guardrails.
- Change at least one thing from its default — that is what makes the step count as done:
- Discount cap — toggle it on and enter a maximum percentage, or
- Forbidden claims — type a phrase and press Enter (or click Add). Any reply containing it is blocked, case-insensitively.
- (Refund requests escalation is already on by default, so leaving it alone — the right call — doesn't tick the step by itself.)
- Click Save guardrails.
A reply that breaks a hard rule is never sent. HyperDM pauses that conversation and hands it to you with a note in the Inbox explaining why.
Full detail: agent-guardrails.md.
Turn on AI replies
This is the switch, and it ships off on purpose: an AI that starts talking to your customers without being asked is the worse failure.
- Go to Agent → Overview.
- Find Reply to DMs automatically at the top.
- Flip the toggle on.
What the switch does and does not do:
- On — DMs your automations don't catch are answered by the agent, using your knowledge and instructions.
- Off — those DMs land in your Inbox for you to answer. Nothing is sent on your behalf. Your keyword automations, flows and comment replies still run — only the open-ended AI fallback is off.
Because of that, you can say not yet on the setup page and it still counts as done. A merchant running comment-to-DM and keyword automations gets real value with this switch off forever. It is reversible at any time.
Test it before a customer does
Two safe ways, neither of which sends anything:
- Agent → AI Playground — ask the agent a question and read the real answer, with the same knowledge, voice and guardrails as a live reply. Nothing is sent, nothing lands in your Inbox, no contact is created. See agent-playground.md.
- The automation builder's Live preview — the right-hand phone mock shows exactly what your DM will look like as you type it.
Build your first automation
The fastest thing that pays off is comment-to-DM.
- Go to Automations. A workspace that has built nothing sees six starter cards.
- Click Comment → DM.
- Follow automations.md.
Six starter cards are offered, one per trigger type: Comment → DM, Keyword → DM, Story reply → DM, Story mention → DM, Conversation starters, and Welcome new followers.
Running ads, or about to boost a post? The same Comment → DM automation answers comments on your Instagram ads — instagram-ad-comments.md walks that setup end to end, including what to do about Facebook placements.
What to read next
- concepts.md — conversations, the 24-hour window, consent, grounding.
- instagram-ad-comments.md — comment-to-DM on boosted posts and Ads Manager ads, from the offer to the first DM.
- dashboard.md — reading your home screen.
- plans-and-billing.md — what Free includes and what each paid tier unlocks.
More in Getting started
- Connect InstagramConnect your Instagram professional account to HyperDM in about two minutes, from the setup page or Settings, and check the card says Connected.Read
- Core conceptsThe vocabulary HyperDM runs on: conversations, the 24-hour window, consent, grounded answers, the compliance gate and which trigger wins.Read
- DashboardYour home screen explained: the stat tiles, recent conversations, the usage meter and the Needs attention list, plus what each empty state means.Read
Try HyperDM for free
50 free conversations a month, no card. Connect Instagram and follow the guide you just read.